
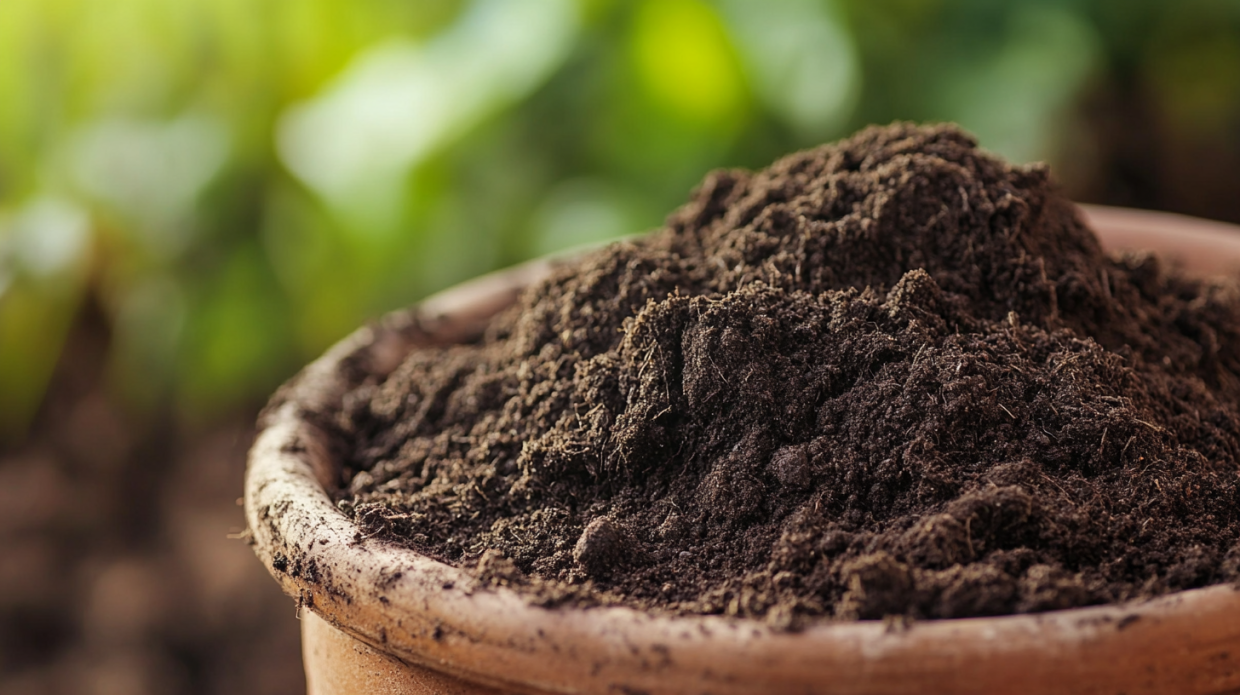

Expert Gardener Garden Soil for In-Ground Plants, 2 cu. ft.
- Expert Gardener™ Garden Soil for In-Ground Plants is a combination soil and fertilizer you can use for all flower and edible gardening projects
- This garden soil is specially formulated for in-ground gardens of fruits, flowers, vegetables, and herbs
- Mix helps promote strong root growth
- Feeds up to 6 months
- Apply 2 to 3 inches to the top of desired planting area, then mix into the top 6 inches of native soil
$4.97

Expert Gardener Garden Soil for In-Ground Plants, 1 cu. ft.
- Expert Gardener™ Garden Soil for In-Ground Plants is a combination soil and fertilizer you can use for all flower and edible gardening projects
- This mix is specially formulated for fruits, flowers, vegetables, and herbs
- Mix helps promote strong root growth
- Feeds up to 6 months
- Apply 2 to 3 inches across the top of the desired planting area, then mix into the top 6 inches of native soil
$3.48

Expert Gardener Organics Garden Soil for In-Ground Plants, 1 cu. ft.
- Expert Gardener Organics™ Garden Soil for In-Ground Plants is specially formulated for all flower and edible gardening projects
- Feeds immediately with organic fertilizer (once watered)
- Great for fruits, flowers, vegetables, and herbs
- Apply 2 to 3 inches of soil to the top of the desired planting area
- Water plants thoroughly after planting and then daily until established
$4.48
When I first started gardening fifteen years ago, I had no idea that the journey would begin with something as seemingly mundane as dirt. Not just any dirt, mind you, but the rich, living ecosystem we call garden soil. Looking back, I realize now that understanding your soil is the single most important factor that determines gardening success. It’s taken me years of trial, error, and endless curiosity to develop the knowledge I’m about to share with you.
Standing in my garden this morning, coffee in hand, watching the sun illuminate the dew on my thriving vegetable beds, I couldn’t help but smile at how far I’ve come. That disastrous first attempt with store-bought potting mix and sad, wilting tomato plants seems like a lifetime ago. Today, I want to guide you through everything I’ve learned about selecting, preparing, and maintaining garden soil that will make your plants not just survive, but truly thrive.
Finding the Perfect Starting Point: Best Soil for Beginners
If you’re new to gardening, the soil aisle at your local garden center can feel overwhelming. Bags upon bags of different mixes, amendments, and additives—where should you begin? After years of experimentation, I’ve found that beginners should look for a high-quality garden soil that offers the perfect balance of structure and nutrients.
The ideal beginner-friendly soil should be a loamy mix that contains:
- Equal parts sand, silt, and clay for proper drainage and water retention
- Sufficient organic matter (around 5%)
- A neutral to slightly acidic pH (between 6.0 and 7.0)
- Basic nutrients to support initial plant growth
When I started, I made the mistake of thinking all bagged soil was created equal. I grabbed the cheapest option and wondered why my plants struggled. Now I know better. Quality garden soil should feel light and crumbly in your hands, with a rich, earthy smell that indicates healthy microbial activity. It shouldn’t be compacted or smell sour or ammonia-like.
For absolute beginners, I recommend starting with a pre-mixed vegetable and herb garden soil. These blends typically contain the right balance of components and basic nutrients to give your plants a good start while you learn more about your specific garden’s needs. Remember, though, that even the best bagged soil will need amendments over time as your plants deplete the nutrients.
The Science Behind Perfect Soil Preparation
Preparing your garden soil is like setting the stage for a performance. Your plants are the stars, but they can only shine with the right foundation beneath them. I’ve developed a systematic approach to soil preparation that has dramatically improved my results over the years.
Step 1: Clear and Clean
First, I remove all existing vegetation, rocks, and debris from the planting area. This includes pulling weeds completely, roots and all. I’ve learned the hard way that skipping this step leads to competing plants and potential disease issues later.
Step 2: Test Before You Invest
Before adding anything to my soil, I test it. This was a game-changer for me. For years, I added amendments blindly, sometimes creating more problems than I solved. Now I use both DIY methods and professional soil tests:
For a quick assessment, I use the jar test:
- Fill a clear jar one-third full with soil
- Add water until the jar is almost full
- Add a teaspoon of dish soap (helps separate particles)
- Shake vigorously and let settle for 24 hours
- Observe the layers: sand settles first (bottom), then silt, then clay (top)
This gives me a rough idea of my soil composition. For more detailed information, I send samples to my local extension office once every two years. The professional test provides exact pH readings and nutrient levels that guide my amendment strategy.
Step 3: Break It Down
Once I understand what I’m working with, I break up the soil structure. For new beds, I dig down about 12 inches, turning and loosening the soil. For existing beds, I use a garden fork to gently lift and separate compacted areas without disrupting the soil layers too much.
This step improves aeration and drainage, which are crucial for root development. I’ve noticed that plants in well-aerated soil establish themselves faster and grow more vigorously than those in compacted conditions.
Step 4: Amend Thoughtfully
Based on my soil test results, I add specific amendments to address deficiencies:
- For sandy soil that drains too quickly, I add compost and aged manure to improve water retention
- For heavy clay that holds too much water, I incorporate coarse sand, compost, and sometimes perlite
- For pH adjustment, I use sulfur to lower pH or lime to raise it, but always in measured amounts
- For nutrient deficiencies, I choose organic amendments like bone meal (phosphorus), blood meal (nitrogen), or greensand (potassium)
I’ve learned to be patient with this process. Meaningful soil improvements happen gradually, and drastic changes can shock plants and disrupt the soil ecosystem.
Breaking Down the Components of Premium Garden Soil
What actually makes up great garden soil? Through my years of experimentation, I’ve identified the key components that create the perfect growing environment:
The Physical Framework
Garden soil needs a balanced physical structure that provides both stability and flexibility for growing roots:
- Sand (0.05-2mm particles): Provides drainage and prevents compaction. Too much creates drought-prone soil.
- Silt (0.002-0.05mm particles): Retains moisture and nutrients better than sand but allows better drainage than clay.
- Clay (smaller than 0.002mm particles): Excellent at holding nutrients and water, but too much leads to poor drainage and compaction.
The perfect balance—loam—typically contains roughly equal proportions of these three components. I’ve found that the feel of good loam is unmistakable once you’ve experienced it: slightly damp, it should form a loose ball when squeezed that crumbles easily when poked.
The Living Component
What truly separates premium garden soil from mere dirt is its biological activity. Healthy soil is actually a living ecosystem containing billions of beneficial organisms per handful. These include:
- Bacteria that break down organic matter and release nutrients
- Fungi that form symbiotic relationships with plant roots
- Protozoa and nematodes that regulate bacterial populations
- Earthworms and arthropods that aerate soil and distribute nutrients
I encourage this biological diversity by avoiding synthetic chemicals and regularly adding organic matter. The difference between my early gardens and current ones is dramatic—plants in biologically active soil simply have access to more nutrients and greater protection from disease.
The Nutrient Reservoir
Finally, good garden soil acts as a storehouse for the nutrients plants need:
- Macronutrients (needed in larger quantities): nitrogen (N), phosphorus (P), potassium (K), calcium (Ca), magnesium (Mg), and sulfur (S)
- Micronutrients (needed in trace amounts): iron, manganese, boron, zinc, copper, molybdenum, and chlorine
The organic matter content is particularly important as it helps retain these nutrients in the soil rather than allowing them to leach away with watering. I aim for about 5-8% organic matter in my vegetable beds, which I maintain through regular additions of compost.
DIY Soil Testing: Becoming Your Garden’s Scientist
Professional soil tests provide the most accurate information, but I’ve developed several DIY methods to monitor my soil between formal tests.
The Squeeze Test for Texture
Take a handful of moist (not wet) soil and squeeze it:
- If it falls apart immediately, it’s too sandy
- If it forms a ball that breaks when poked, it’s good loamy soil
- If it forms a sticky ball that doesn’t break easily, it has too much clay
The Drainage Test
Dig a hole about 12 inches deep and fill it with water. Let it drain completely, then fill it again and time how long it takes to drain:
- Less than 10 minutes: drainage is too fast (sandy soil)
- Between 10-30 minutes: good drainage (loamy soil)
- More than 4 hours: poor drainage (clay soil)
I’ve used this test to identify problem areas in my garden and address them specifically rather than treating my entire garden the same way.
The Earthworm Census
Dig up a cubic foot of soil and count the earthworms:
- 10+ earthworms: excellent biological activity
- 5-9 earthworms: good biological activity
- Fewer than 5: poor biological activity
When I first started counting, I found only 2-3 worms in my garden soil. After years of organic practices and compost additions, I now regularly count 15-20 per cubic foot—a living testament to improved soil health.
The pH Test
While home pH test kits are available, I’ve found a simple vinegar and baking soda test can give a rough indication:
- Place two tablespoons of soil in separate containers
- Add 1/2 cup vinegar to one sample. If it fizzes, the soil is alkaline (pH above 7)
- Mix the other sample with distilled water to make mud, then add 1/2 cup baking soda. If it fizzes, the soil is acidic (pH below 7)
- No reaction to either test suggests a neutral pH
This isn’t as precise as a proper pH test, but it helps me monitor major shifts between professional tests.
Essential Nutrients: Feeding Your Garden Properly
Understanding plant nutrition transformed my gardening results. Plants need 17 essential elements to thrive, and most come from the soil. Here’s how I ensure my plants get what they need:
Nitrogen (N)
Nitrogen promotes leafy growth and gives plants their green color. I’ve learned to recognize nitrogen deficiency by yellowing older leaves, while excess nitrogen causes excessive foliage but poor flowering and fruiting.
My favorite nitrogen sources include:
- Composted manure (adds 1-2% nitrogen slowly over time)
- Blood meal (12-15% nitrogen for a quicker boost)
- Cover crops like legumes that fix atmospheric nitrogen into the soil
Phosphorus (P)
Phosphorus supports root development and flowering. Deficiency shows as purple-tinged leaves and poor fruit production.
I add phosphorus through:
- Bone meal (15-27% phosphorus that releases slowly)
- Rock phosphate (a natural mineral that provides long-term phosphorus)
- Fish meal (a balanced amendment that includes phosphorus)
Potassium (K)
Potassium strengthens plants and improves disease resistance. Signs of deficiency include brown leaf edges and weak stems.
My go-to potassium sources are:
- Wood ash (contains about 5% potassium, but use sparingly as it raises pH)
- Greensand (5-7% potassium released over several years)
- Compost (provides moderate amounts of potassium along with other benefits)
Secondary and Micronutrients
Beyond NPK, plants need calcium, magnesium, sulfur, and various micronutrients. Rather than adding these individually, I focus on building overall soil health through:
- Regular additions of compost (provides a full spectrum of nutrients)
- Occasional applications of seaweed extract (rich in micronutrients)
- Maintaining proper pH (which affects nutrient availability)
I’ve found that addressing specific deficiencies is sometimes necessary, but a holistic approach to soil fertility generally prevents problems before they start.
Vegetable Garden Soil: Special Considerations
Vegetable gardens have unique soil requirements compared to ornamental beds. My vegetable plots are my pride and joy, and I’ve refined my approach over many growing seasons.
Depth Matters
Vegetables need deeper soil than many ornamental plants. I maintain at least 12-18 inches of loose, fertile soil in my raised beds. This accommodates deep-rooted vegetables like tomatoes and parsnips while providing ample space for root vegetables to develop properly.
Rotation Prevents Depletion
Different vegetables remove different nutrients from the soil. I use a 4-year rotation system in my garden to prevent both nutrient depletion and pest buildup:
- Year 1: Leafy greens (heavy nitrogen feeders)
- Year 2: Fruiting vegetables like tomatoes and peppers (heavy feeders of various nutrients)
- Year 3: Legumes like beans and peas (nitrogen fixers that improve soil)
- Year 4: Root crops (light feeders that benefit from the previous years’ amendments)
This system has dramatically reduced disease problems in my garden while maintaining soil fertility with minimal inputs.
Consistent Moisture
Vegetables are particularly sensitive to moisture fluctuations. I’ve found that incorporating plenty of organic matter (compost) into my vegetable garden soil helps maintain consistent moisture levels, reducing stress on plants and preventing issues like blossom end rot in tomatoes.
Higher Organic Matter Content
While ornamental beds might thrive with 3-5% organic matter, my vegetable gardens perform best with 7-10%. I achieve this through:
- Annual additions of 2-3 inches of compost
- Cover cropping during off-seasons
- Mulching with organic materials that break down over time
The extra organic matter supports the higher nutrient demands of productive vegetable plants and feeds the soil biology that makes those nutrients available.
Expert Soil vs. Regular Soil: Understanding the Difference
When I compare my current garden soil to what I started with, the differences are dramatic. What sets expert-level garden soil apart from average soil?
Physical Structure
Expert garden soil has:
- A crumbly, cake-like texture that holds its shape when moist but breaks apart easily
- Visible organic matter throughout
- A deep topsoil layer (8+ inches)
- Evidence of earthworm activity
- No compacted layers that restrict root growth
Regular soil often lacks these characteristics, showing compaction, poor aggregation, or excessive sandiness or clay content.
Biological Activity
Expert soil is teeming with life:
- Fungal networks visible as white threads when soil is gently separated
- Abundant earthworms and beneficial insects
- Quick breakdown of organic matter
- Earthy, pleasant smell indicating aerobic decomposition
Regular soil may have limited biological activity, resulting in slower nutrient cycling and less resilient plants.
Nutrient Balance and Availability
Expert soil provides:
- Balanced nutrients appropriate for the plants being grown
- Stable pH that allows optimal nutrient availability
- Sufficient micronutrients from diverse organic inputs
- Good cation exchange capacity (CEC) that prevents nutrient leaching
Regular soil often has nutrient imbalances, improper pH, or poor nutrient retention that leads to frequent deficiencies.
Water Management
Expert soil:
- Absorbs water quickly without puddling
- Retains moisture without becoming waterlogged
- Remains workable shortly after rain
- Resists erosion during heavy precipitation
Regular soil may drain too quickly or too slowly, creating stress for plants and making gardening more difficult.
The journey from regular to expert soil takes time—in my experience, at least 3-5 years of consistent care—but the results are worth every effort.
Indoor Plants: Can Garden Soil Make the Move Inside?
One of the most common questions I receive is whether outdoor garden soil can be used for houseplants. From my experience, the short answer is generally no, but understanding why has helped me create better growing environments for both my indoor and outdoor plants.
The Problems with Using Garden Soil Indoors
I learned this lesson the hard way when I brought some of my “perfect” garden soil inside for houseplants and quickly encountered issues:
- Compaction in containers: Garden soil compacts severely in pots, restricting root growth and oxygen availability.
- Drainage issues: Garden soil doesn’t provide adequate drainage in the confines of a pot, leading to root rot.
- Pest introduction: Outdoor soil can introduce insects, their eggs, and disease organisms into your home environment.
- Weed seeds: Despite my best efforts, garden soil invariably contains some weed seeds that can sprout indoors.
Better Alternatives for Indoor Plants
Instead of garden soil, I use a custom indoor potting mix that provides:
- Adequate aeration: I include perlite or pumice (about 25% of the mix) to create air pockets.
- Proper drainage: Coarse materials like bark chips or coir chunks prevent water saturation.
- Stable structure: Indoor mixes should resist breaking down quickly since they aren’t naturally renewed like outdoor soil.
- Clean materials: Commercially sterilized components prevent introducing pests and diseases.
My basic indoor potting formula consists of:
- 1 part coco coir (more sustainable than peat moss)
- 1 part perlite or pumice
- 1 part compost (well-aged and screened)
- A small amount of worm castings for slow-release nutrients
This mix provides the benefits of good soil structure without the drawbacks of using garden soil directly.
Transforming Poor Soil: My Rehabilitation Strategy
When I purchased my current property, the soil was in terrible condition—compacted clay with almost no organic matter. Over five years, I transformed it into rich, productive garden soil. Here’s the systematic approach I developed:
Step 1: Assess the Problems
First, I conducted thorough testing to understand exactly what I was dealing with:
- Heavy clay content (over 60%)
- Very low organic matter (less than 1%)
- Compacted subsoil at about 6 inches depth
- pH too high for most garden plants (7.8)
- Severe nutrient imbalances (high calcium, low potassium)
Step 2: Address Structural Issues First
I focused on improving the physical structure before worrying about nutrients:
- Double-digging to break through compaction layers
- Adding coarse organic matter (partially decomposed leaves and wood chips) to create air spaces
- Incorporating coarse sand in small amounts to improve drainage
Step 3: Build Biology
Once the structural foundation was improved, I concentrated on building soil life:
- Applying compost tea to introduce beneficial microorganisms
- Mulching heavily to provide food for soil organisms
- Minimizing soil disturbance to allow fungal networks to establish
- Planting cover crops to feed soil life during off-seasons
Step 4: Balance Chemistry
Only after addressing structure and biology did I focus on specific nutrient and pH issues:
- Using elemental sulfur to gradually lower pH
- Adding specific amendments based on soil test results
- Using foliar sprays to address immediate plant needs while soil improved
Step 5: Maintain and Monitor
The rehabilitation wasn’t a one-time fix but required ongoing care:
- Annual soil tests to track progress
- Regular additions of organic matter
- Careful observation of plant performance as an indicator of soil health
- Adjusting my approach based on results
The transformation was remarkable. What was once unproductive clay now grows abundant vegetables and flowers with minimal inputs. The key was patience—understanding that soil improvement is a marathon, not a sprint.
Top Soil Amendments: My Proven Favorites
After years of experimentation, I’ve identified several soil amendments that consistently deliver results in my garden:
For Improving Soil Structure
- Compost: Nothing beats well-made compost for all-around soil improvement. I add 2-3 inches to my beds annually.
- Leaf Mold: Partially decomposed leaves create a soil conditioner that improves both drainage and water retention. I collect fallen leaves each autumn and compost them separately.
- Biochar: I’ve been experimenting with biochar for the past three years and have seen impressive results. This charcoal-like substance creates permanent pore spaces in soil and serves as habitat for beneficial microorganisms.
For Adding Nutrients
- Worm Castings: These provide slow-release nutrients and beneficial microbes. I maintain several worm bins to produce this “black gold” year-round.
- Alfalfa Meal: Contains triacontanol, a natural growth stimulant, along with good nitrogen levels. I use it as a spring soil energizer.
- Rock Dust: Provides a broad spectrum of minerals and trace elements that are often depleted in garden soils. I apply it every few years based on soil test results.
For Specific Problems
- Gypsum: Helps break up clay soil without affecting pH. I’ve used it successfully in areas where clay was particularly problematic.
- Elemental Sulfur: Gradually lowers soil pH for acid-loving plants. I apply it in fall for spring planting of blueberries and azaleas.
- Activated Charcoal: Helps remove toxins and chemicals from soil. I’ve used it successfully to rehabilitate areas where previous owners applied persistent herbicides.
What I’ve learned is that quality matters tremendously with amendments. I source mine carefully from reputable suppliers and, when possible, make my own to ensure purity and effectiveness.
Weed Prevention: Strategies for Cleaner Garden Soil
Weeds compete with plants for nutrients and can quickly overwhelm a garden. Through trial and error, I’ve developed effective weed prevention strategies that don’t rely on chemical herbicides:
Mulching Strategically
I use different mulches for different purposes:
- Straw: In vegetable gardens where I need light, easy-to-move mulch
- Wood chips: On pathways and around perennial plants (kept away from stems)
- Living mulches: Clover and other low-growing plants in orchards and between widely spaced plants
- Compost: A thin layer as mulch provides both weed suppression and nutrition
The key is applying mulch at the right depth—2-3 inches for most materials—and renewing it before it breaks down completely.
Pre-Emptive Planting
I’ve found that preventing weeds is much easier than removing them. I use these approaches:
- Close spacing of desirable plants: Creating a living mulch that shades out weed seedlings
- Cover cropping: Keeping soil continuously occupied with beneficial plants
- Interplanting: Combining plants with different growth habits to occupy all available niches
The Stale Seedbed Technique
This method has dramatically reduced my weeding time:
- Prepare the soil for planting, but don’t plant immediately
- Water the area to encourage weed seeds to germinate
- Eliminate emerging weeds with flame weeding or light cultivation
- Repeat if time allows
- Plant into the “stale seedbed” with minimal soil disturbance
This technique depletes the weed seed bank over time, resulting in progressively cleaner soil with each season.
Careful Composting
Weed seeds can survive composting if conditions aren’t right. I ensure my compost reaches high enough temperatures (at least 140°F) to kill weed seeds. For weeds that have gone to seed, I dispose of them separately rather than adding them to my compost pile.
Perfect pH: Finding the Sweet Spot for Your Plants
Soil pH affects nutrient availability more than any other single factor. Understanding and managing pH has transformed my gardening results.
What pH Really Means
pH measures soil acidity or alkalinity on a scale from 0-14, with 7 being neutral. Most garden plants prefer slightly acidic soil (6.0-6.8) because nutrients are most available in this range. When soil is too acidic or too alkaline, certain nutrients become locked up and unavailable to plants, regardless of how much you apply.
Testing pH Accurately
I test my soil pH at least annually using:
- A quality digital pH meter for quick checks
- Laboratory testing for comprehensive results
- pH color indicator kits for general monitoring
The investment in accurate testing has saved me countless dollars in wasted amendments and prevented plant problems.
Adjusting pH Effectively
To lower pH (make soil more acidic):
- Elemental sulfur (works slowly but effectively)
- Acidic organic matter like pine needles and oak leaves
- Aluminum sulfate (works quickly but must be used carefully)
To raise pH (make soil more alkaline):
- Agricultural lime (calcium carbonate)
- Dolomitic lime (when magnesium is also needed)
- Wood ash (raises pH quickly, so use sparingly)
I’ve learned to make small, incremental changes rather than dramatic adjustments. Large pH shifts can shock soil life and create new problems. My rule of thumb is to adjust no more than 0.5 pH units per year.
pH Microclimates
Different areas of my garden naturally develop different pH levels. Rather than fighting these variations, I work with them by:
- Grouping acid-loving plants (blueberries, azaleas, etc.) in naturally acidic areas
- Placing pH-tolerant plants in transition zones
- Reserving naturally alkaline spots for plants that prefer higher pH
This approach creates a garden that works in harmony with natural conditions rather than constantly fighting against them.
Fertilization Frequency: Less Is Often More
When I started gardening, I was guilty of over-fertilizing. Now I understand that timing and moderation are more important than quantity when it comes to feeding plants. My approach has evolved to be more responsive to plant needs and seasonal cycles.
Understanding Plant Needs
Different plants have different nutritional requirements at various growth stages:
- Leafy vegetables need nitrogen during active growth
- Fruiting plants need phosphorus during flowering and fruiting
- Most plants need less fertility during dormant periods
I’ve created a calendar specific to my garden that reminds me when different plant groups need fertilization.
Observation-Based Fertilizing
Rather than following a rigid schedule, I watch for signs that plants need nutrients:
- Pale leaves (nitrogen deficiency)
- Purplish tinge to leaves (phosphorus deficiency)
- Scorched leaf margins (potassium deficiency)
These visual cues allow me to address specific needs rather than applying general fertilizers that might create imbalances.
My Fertilization Timeline
For most established gardens, I follow this general schedule:
Early Spring (Pre-Planting)
- Apply compost to all beds (1-2 inches)
- Add slow-release organic fertilizers based on soil test results
Late Spring/Early Summer
- Light feeding of actively growing plants with compost tea
- Side-dress heavy feeders like tomatoes and corn with compost
Mid-Summer
- Monitor for signs of deficiency and address specific issues
- Foliar feeding with seaweed extract during high-stress periods
Fall
- Apply amendments that need time to break down (like rock phosphate)
- Plant cover crops to capture and recycle nutrients
This approach provides nutrients when plants can use them effectively while minimizing waste and environmental impact.
Aeration Techniques: Breathing Life Into Your Soil
Proper aeration is essential for healthy soil. Over the years, I’ve developed both regular maintenance practices and rehabilitation techniques to ensure my soil gets the oxygen it needs.
For Routine Maintenance
- Vertical Mulching: I drill 1-2 inch holes about 12 inches deep throughout my beds and fill them with compost or leaf mold. This creates vertical channels for air, water, and roots.
- Broadfork Use: Rather than tilling, I use a broadfork in established beds. This tool decompacts soil without inverting layers or disrupting soil life.
- Biological Aeration: I encourage earthworms and other soil organisms that create natural aeration. A handful of worm castings added to planting holes introduces these valuable aerators.
For Compacted Soil Rehabilitation
- Radial Trenching: Around established trees with compaction issues, I dig trenches radiating from the trunk (staying outside the root flare) and fill them with compost mixed with coarse material like pumice.
- Core Aeration: In lawn areas that will be converted to garden beds, I use a core aerator to remove plugs of soil, then top-dress with compost.
- Deep Ripping: For new beds with severe compaction, I use a garden fork to create deep channels in a grid pattern, then fill these channels with organic matter.
Regardless of the method, I’ve found that aeration is most effective when:
- Soil is moderately moist (not wet or extremely dry)
- Temperature is moderate (spring or fall is ideal)
- It’s followed by an application of compost or other organic matter
The results of proper aeration are visible within weeks—plants root more deeply, water penetrates more effectively, and soil life becomes more active.
Organic Soil Building: My Chemical-Free Approach
Converting to organic soil management was one of the best gardening decisions I’ve made. The transition took about three years, but the resulting resilience and productivity of my garden made it worthwhile.
Core Principles of My Organic Soil System
- Feed the soil, not the plants: I focus on creating healthy soil that naturally nourishes plants rather than bypassing soil with direct fertilizers.
- Closed-loop nutrition: I aim to produce as many of my soil amendments on-site as possible through composting, cover cropping, and plant recycling.
- Minimal disturbance: I avoid practices that disrupt soil structure and biology, such as deep tilling or leaving soil bare.
- Diversity above and below ground: I plant diverse species to support diverse soil life, understanding that biodiversity creates resilience.
My Organic Amendment Toolkit
When I need to bring in materials, I use:
- Compost: The foundation of my system, providing both nutrients and biological activity
- Cover crop seeds: Different species for different seasons and purposes
- Rock minerals: Slow-release sources of micronutrients that feed soil gradually
- Organic fertilizers: Derived from plant and animal sources when specific nutrients are needed
Transitioning from Conventional to Organic
If you’re transitioning to organic soil management, I recommend this phased approach based on my experience:
Year 1: Focus on building organic matter and beginning to reduce synthetic inputs.
- Add 2-3 inches of compost to all growing areas
- Begin composting garden and kitchen waste
- Reduce synthetic fertilizer applications by half, substituting compost tea
- Introduce cover crops in any fallow areas
Year 2: Improve soil biology and further reduce synthetic inputs.
- Continue adding organic matter
- Introduce specific beneficial organisms through inoculants
- Eliminate synthetic fertilizers, using organic alternatives when needed
- Expand cover cropping and begin crop rotation
Year 3: Refine and optimize the organic system.
- Focus on producing amendments on-site
- Fine-tune specific nutrients based on soil tests and plant performance
- Develop site-specific planting plans that support soil health
The transition period can sometimes show temporary decreases in productivity, but by year three, my garden was outperforming its conventional days with fewer inputs and problems.
Flower Garden Soil: Special Considerations
Flower gardens have different soil requirements than vegetable gardens. Through much experimentation, I’ve found the ideal approaches for different types of flowering plants.
Annuals vs. Perennials
Annual flowers generally need:
- Higher fertility, especially phosphorus for abundant blooming
- Consistent moisture with excellent drainage
- Regular nutrient renewal throughout their short life cycle
I prepare annual beds with:
- 30% compost mixed into the top 8 inches of soil
- A balanced organic fertilizer incorporated before planting
- Monthly light feeding during the blooming season
Perennial flowers generally prefer:
- More stable soil conditions with less frequent disruption
- Moderate, slow-release fertility
- Excellent drainage, especially for winter survival
For perennial beds, I:
- Prepare soil deeply (12-18 inches) before the initial planting
- Use more coarse organic matter for long-term soil structure
- Top-dress with compost annually rather than digging it in
- Apply balanced organic fertilizer just once in early spring
Specialized Flower Soil Needs
Different flowering plants have evolved in specific soil conditions:
For acid-loving flowers (camellias, azaleas, hydrangeas):
- I maintain pH between 5.0-6.0
- Use pine needle mulch that gradually acidifies soil
- Avoid limestone-based amendments
For drought-tolerant flowers (lavender, Russian sage, yarrow):
- I create leaner soil with more sand and less organic matter
- Incorporate small gravel to improve drainage
- Avoid high-nitrogen amendments that create floppy growth
For heavy feeders (roses, dahlias):
- I create rich soil with up to 40% compost
- Add alfalfa meal for natural growth stimulants
- Mulch with composted manure for slow-release nutrition
Understanding these specialized needs has allowed me to create targeted soil environments where specific flowers thrive rather than merely survive.
Soil Recycling: Sustainability in Practice
Garden soil is a valuable resource that should be maintained and recycled. I’ve developed several practices to ensure no soil goes to waste in my garden.
Container Soil Rejuvenation
Rather than discarding potting soil at the end of the season, I:
- Remove spent plants and shake soil from their roots
- Spread the soil on a tarp in the sun for a few days to eliminate pathogens
- Sift out large debris and break up any compacted chunks
- Add equal parts fresh compost and mix thoroughly
- Add a small amount of balanced organic fertilizer
- Use this rejuvenated mix at a ratio of 1:1 with fresh potting soil
This approach reduces waste while inoculating new potting soil with beneficial organisms from my garden.
Soil Rotation Within the Garden
I practice soil rotation alongside crop rotation:
- Every few years, I move soil between different garden areas
- Vegetable garden soil gets moved to flower beds
- Flower bed soil moves to the herb garden
- Herb garden soil returns to the vegetable garden
This rotation helps prevent the buildup of plant-specific pathogens and pests while redistributing nutrients throughout the garden.
Soil Banking
During major garden projects, I create a “soil bank”:
- Excess soil from any garden project gets stored in a dedicated area
- I layer this soil with compost and cover it with a breathable tarp
- Every few months, I turn the pile to maintain aeration
- This “banked” soil becomes premium material for future projects
This practice has saved me thousands of dollars on purchased soil while ensuring I always have well-aged soil available for new beds or repairs.
Maintaining Soil Health: The Ongoing Journey
Maintaining healthy soil is not a one-time project but a continuous process. Here are the maintenance practices that have proven most valuable in my garden:
Seasonal Soil Care Calendar
Spring:
- Test soil as plants begin active growth
- Apply compost as a top dressing (1 inch)
- Add balanced organic fertilizer based on test results
- Gently incorporate amendments with a garden fork
Summer:
- Monitor soil moisture consistently
- Maintain organic mulch at 2-3 inch depth
- Apply compost tea monthly to boost microbial activity
- Perform visual assessments of plant health for signs of deficiencies
Fall:
- Add soil amendments that need time to break down
- Plant cover crops in vacant areas
- Collect fallen leaves for composting
- Apply mulch to protect soil during winter
Winter:
- Continue composting kitchen scraps
- Plan next year’s planting to ensure proper rotation
- Review soil test results and research specific improvements
- Cover exposed soil with mulch or row covers
Record-Keeping for Soil Improvement
One practice that dramatically improved my results was keeping detailed soil records:
- Annual pH and nutrient test results
- Amendments applied (type, amount, date)
- Observations of plant performance
- Weather conditions that affected soil
Reviewing these records helps me identify patterns and make more informed decisions each year.
Balancing Intervention and Observation
Perhaps the most important lesson I’ve learned is knowing when to act and when to observe. Healthy soil is a self-regulating system that sometimes needs time to find its balance after changes. I’ve developed the discipline to:
- Make one change at a time
- Wait at least a full growing cycle before evaluating results
- Trust the soil ecosystem to respond in its own time
- Intervene only when truly necessary
This patience has prevented many well-intentioned mistakes and allowed natural soil processes to work their magic.
The Composting Revolution: Transforming Waste into Garden Gold
No discussion of garden soil would be complete without addressing composting. Creating my own compost has been the single most transformative practice for my soil health.
Multiple Composting Methods for Different Needs
I maintain several composting systems:
Traditional Pile Composting:
- For large volumes of garden waste
- Built in 3’x3’x3′ dimensions for optimal heating
- Layered with green (nitrogen-rich) and brown (carbon-rich) materials
- Turned every 2-3 weeks during active decomposition
Vermicomposting (Worm Bins):
- For kitchen scraps and small amounts of garden waste
- Produces nutrient-rich worm castings
- Operates year-round, even in winter
- Creates a microbially diverse amendment perfect for seedlings
Bokashi Fermentation:
- For difficult items like meat scraps and dairy
- Creates a pre-compost fermented material
- Allows recycling of a broader range of kitchen waste
- Produces a valuable liquid fertilizer as a byproduct
Leaf Mold Production:
- Dedicated area for fallen leaves
- Takes longer (1-2 years) but creates premium soil conditioner
- Requires minimal maintenance once established
- Produces a fungal-dominant compost ideal for woody plants
Compost Quality Assessment
I’ve learned to evaluate compost quality before application:
- Finished compost should smell earthy, not sour or ammonia-like
- It should be dark brown to black with few recognizable components
- The temperature should have cooled to ambient conditions
- A handful should be moist but not wet, like a wrung-out sponge
High-quality compost provides not just nutrients but billions of beneficial microorganisms that enhance soil biology.
Winter Soil Protection: Preserving Your Garden’s Foundation
Winter can be hard on garden soil, with erosion, nutrient leaching, and structure damage all potential concerns. My winter soil protection strategy has evolved over years of observing what works best in my climate.
Cover Cropping: The Living Mulch
I use different cover crops for different purposes:
- Winter rye: For areas that will be planted late the following spring
- Hairy vetch: For adding nitrogen to soil that will grow heavy feeders
- Crimson clover: For areas that need early spring preparation
- Winter peas: For improving soil while providing early spring harvests
Cover crops protect soil from erosion, prevent nutrient leaching, add organic matter, and support soil biology during otherwise dormant periods.
Mulching Strategies for Winter
When cover crops aren’t practical, I use these mulching approaches:
- Straw: For vegetable beds that will be planted early in spring
- Shredded leaves: For perennial beds and around shrubs
- Pine needles: For acid-loving plants and berries
- Wood chips: For pathways and around established trees (kept away from trunks)
I apply winter mulch after the ground has cooled but before it freezes, typically 3-4 inches deep.
Raised Bed Winter Care
My raised beds get special winter treatment:
- Remove annual plants completely, including roots
- Add 1 inch of compost to the surface
- Broadcast cover crop seeds or apply mulch
- Install hoops and row covers on beds that will be planted very early
This approach prevents soil compaction from winter precipitation while adding organic matter that can break down slowly during winter thaws.
Snow Management for Soil Health
I’ve learned to appreciate snow as a soil insulator and moisture source. Rather than clearing it completely, I:
- Leave snow in place over garden beds
- Gently remove heavy snow from delicate shrubs and structures
- Redirect snowmelt to ensure it soaks into garden soil rather than running off
The slow melting of snow provides gentle hydration while protecting soil life from extreme temperature fluctuations.
Conclusion: Soil as a Living Legacy
As I look out at my garden today, I’m struck by how much the soil has changed over the years. What was once lifeless dirt is now a vibrant ecosystem teeming with earthworms, beneficial fungi, and the countless microscopic organisms that support my plants. This transformation didn’t happen overnight—it was the result of consistent care, thoughtful intervention, and a willingness to learn from both successes and failures.
I’ve come to see my soil as more than just a growing medium; it’s a living legacy that improves with each passing season. The work I do today building healthy soil will benefit my garden for years to come, and potentially for generations beyond my own time here. There’s something profoundly satisfying about that continuity.
If there’s one lesson I hope you take from this guide, it’s that patience and observation are the gardener’s greatest tools when it comes to soil improvement. Quick fixes may provide temporary results, but lasting soil health comes from working with nature’s systems rather than trying to override them.
Start where you are, with the soil you have. Test it, observe it, and make incremental improvements. Add organic matter consistently, protect soil life, and minimize disturbance. In time, you’ll develop not just better soil, but a deeper connection to the natural cycles that sustain all life.
Happy gardening, and may your soil grow richer with every passing season.